
First things first: I am a cookie decorator who makes cookies for humans. Cookies full of sugar and butter and all things fattening and fabulous. They taste amazing, they look amazing… you get the idea. I’ve made cookies for all kinds of events and themes, and humans LOVE them. But I realized, you know what else humans LOVE: their fur babies. Like buy matching sweaters, create custom collars, paint-their-nails-kind of love. Confession: Last night I was looking for matching Christmas jammies for our family and a big selling point was if they had a pet fam jam option so our cats could match with us. Talk about the cat’s pajamas! literally!
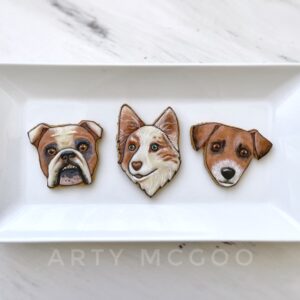
When I saw this super simple dog biscuit mix at PetSmart it got me thinking: What a special and unique gift it would be to make custom portrait biscuits for my friend’s dogs! Happy pet owner: check. Happy pet: check. Totally unique and thoughtful gift: check & check! I decorate cookies, how different could decorating a dog biscuit be?
As it turns out, it is VERY different to decorate for dogs. My cats love to eat cookies. Is it good for them? no. Do I feed them cookies? no. Do they sometimes get ahold of cookies and lick them to death? yes. But I wanted to give a gift that any dog lover would feel good about feeding their dog (also I didn’t want to be that dog aunt that is a bad influence or feed them something that could potentially make them sick). The dog biscuit mix is already a healthy blend of ingredients and I just added a little oil and water per the instructions on the box. Easy peasy! It even came with a Christmas tree cookie cutter.
Baking dog treats was all new to me so I was pleasantly surprised when the house smelled similar to a graham cracker after taking them out of the oven. Time to decorate! While perusing the interwebs for dog-friendly icing recipes I found out sugar is a no, meringue powder is a no, cream of tartar is a no. Basically everything I’m used to decorating with is a NO. Wooof! What have I gotten myself into? I tried a recipe using cornstarch and water and that was a disaster. Next up greek yogurt and cornstarch: a slightly less horrific result. Next I tried an icing mix meant for dogs. The best way to describe the results is “meh”.
At this point a normal, sane person might say, “This is for a dog. The dog doesn’t care what the biscuit looks like!” Apparently I am not a normal, sane person and the previous failures made me say, “There HAS to be a dog-friendly way to make beautifully decorated biscuits! Dogs MUST be able to eat an intricately decorated portrait of themselves!” (raised fist in the air for emphasis)
I became a mad scientist. I researched all the ingredient possibilities from cream cheese to peanut butter (but not if it has xylitol in it!). I came up with theories as to what dog-friendly ingredients would help or hinder my quest for a royal icing-like confection. I mixed up batch after batch of icing, adjusting and taking notes as I went. The biggest problems I encountered were the texture was too difficult to work with, and the icing cracked as it dried on the biscuit.
After countless versions of mixes I ended up with something I am super proud of. While it it doesn’t behave exactly like royal icing, it comes pretty darn close and without having any sugar, meringue powder, or cream of tartar in it, I consider that a HUGE success. I haven’t tried thickening it enough to pipe roses… that would be crazy… right? (puts it on “to do” list). But it does what I need it to do. I can get the beautiful details I’m looking for while decorating and it dries just like royal icing decorated cookies, giving the option to package and ship treats to our furry friends afield.
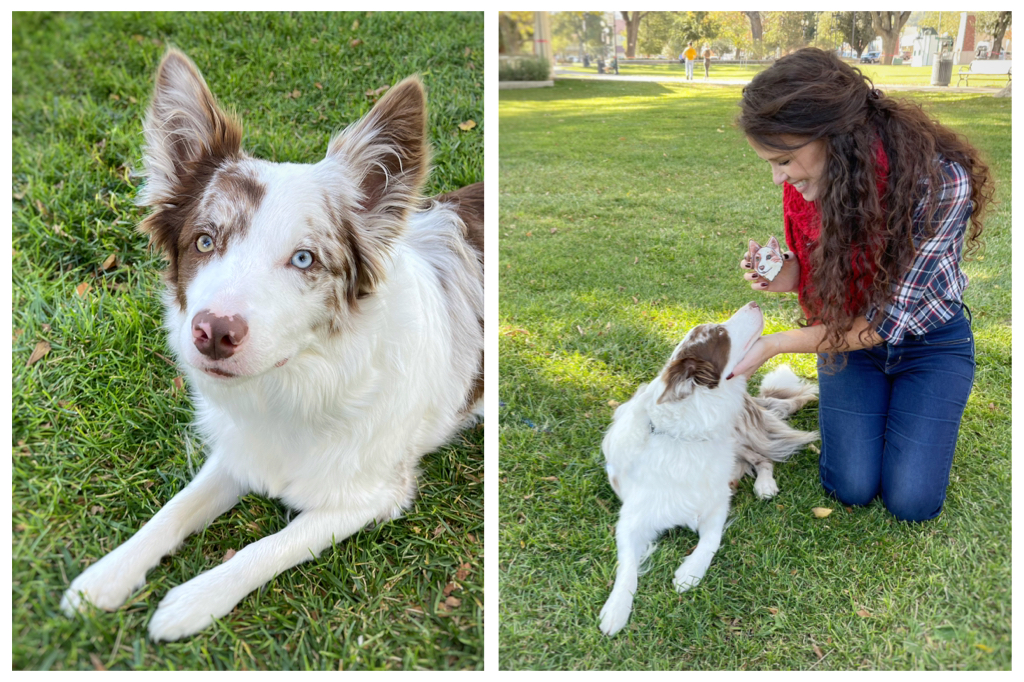 But how does it taste? I got to give my friend’s dog, Lola her very own portrait biscuit and she absolutely LOVED it! I think she was also super impressed with how it looked. I did test the icing and it tasted quite a bit like plain greek yogurt. I was happy to see that her dog taste buds thought it was delish. You can watch her enjoy her biscuit here! I guess it really is a dog eat dog world.
While I wouldn’t call any of the ingredients pantry staples, most of the ingredients were readily available at my local grocery store. Two ingredients were a couple quick clicks on my keyboard and they were on my doorstep 2 days later. (If you have a very well stocked health food store nearby you may be able to track them all down locally).
Now that I’ve covered “the good” (a dog-friendly icing recipe that is awesome!) “the bad” (some ingredients aren’t already in your pantry) I’ll go over “the ugly“. Whenever it comes to decorating, icing can be temperamental and can be affected by humidity levels, temperature, type of food coloring, if you decorate on a Tuesday… seriously the list of variables is endless. A couple of times I found small cracks on the dried icing 4-5 days after decorating. This can be really frustrating, especially if you went to all the trouble to create something beautiful. If you experience cracking in your icing I would suggest increasing the coconut oil and/or decreasing the yogurt powder. Another way to avoid cracking issues: give the decorated cookies to your dog as soon as they are dried.
 This recipe makes a small batch of icing, but I found it was plenty to decorate this batch of biscuits. After cutting out my portrait cookies I used some adorable mini dog cookie cutters to create festive sweater-clad dogs. Just like cookies, you can color and decorate your dog biscuits a million different ways using different colors, there are even dog-friendly sprinkles. The paw-sabilities are endless!
Dog-Friendly Icing Recipe
Ingredients
- 3 tbsp dried egg whites pasteurized powder
- ¼ C water
- ¼ C tapioca flour also known as tapioca starch
- 1½ tbsp yogurt powder
- 1 tsp coconut oil, melted
Optional for a thicker piping consistency
- a small pinch of guar gum or tapioca flour
Instructions
- Whisk together dried egg whites and water in a medium bowl until frothy.
- Mix in tapioca flour and yogurt powder.
- Stir in coconut oil until all ingredients are combined.
- Divide icing into bowls and color with concentrated food coloring or powdered food coloring.
- Place icing into tipless decorating bags. Cut a small opening and decorate something beautiful!
- Optional: thicken some of the icing with guar gum or tapioca flour to use for piping details or outlining designs.
Notes
- Unlike royal icing, this makes a thin flood consistency frosting that you can thicken for piping details.
- Let icing rest for 5-10 minutes as icing will thicken a bit after mixing (I found the consistency just right to flood without any additions)
- If you still find it too thin for your preference: mix in a little more tapioca flour. If it's too thick: add a bit more water.
- To create a piping consistency add guar gum or more tapioca flour to thicken. Guar gum is a stronger thickener than tapioca flour so you will need less. The amount of either ingredient you need to thicken will depend on how much icing you are thickening. Add a very small amount at a time to reach desired thickness.
- Tipless bags are super convenient. Just fill with icing, tie a knot, and snip open to your desired size and decorate! 100 pack of tipless bags here
- Using concentrated or powdered food coloring will create saturated colors quicker and won't affect the consistency of the icing by adding more liquid.
- After decorating, allow iced cookies to dry before packaging or stacking (depending on humidity this could take up to 24 hours and will take longer than royal icing to completely dry). I have not experimented with using my dehydrator to speed up drying yet.
- You can paint details on the dried icing using food color and a small amount of water or a food color marker.
I’ve had many different dog treat recipes. They are chalky, hard to work with, dry too fast, and are dull when dry. This recipe is very close to the feeling of real royal icing! Super excited to find this! I only wish I could find egg white powder that doesn’t cost so much. I might make my own. 🙂 Thanks for sharing this recipe!
Hi,
I really thought this icing would be different. Like Liz, above, every dog treat icing I try dries with cracks and lacks luster. Unfortunately, this one did, too. Arty, is there a trick you’re not sharing? I’ve thrown out a lot of product.
The texture was really nice to work with. But in the morning when the cookies were dry, they were full of cracks